Introduction to DIY Garden Projects for Small-Scale Farmers
Small-scale farmers often seek creative solutions for efficient gardening.
DIY garden projects provide practical and cost-effective options.
These projects encourage sustainable practices and maximize resources.
Furthermore, they allow farmers to customize their gardens according to their needs.
In this section, we will explore various DIY projects that enhance gardening efforts.
Benefits of DIY Garden Projects
DIY projects offer numerous advantages for small-scale farmers.
Firstly, they reduce external expenses related to gardening supplies.
Next, farmers gain hands-on experience through these projects.
Moreover, they foster creativity and innovation in gardening techniques.
Additionally, DIY projects promote community engagement and shared knowledge.
Key Types of DIY Projects
There are several popular categories of DIY garden projects to consider.
- Composting systems enhance soil health and reduce waste.
- Raised garden beds improve accessibility and optimize space.
- Vertical gardens save space and create a visual appeal.
- Cold frames extend the growing season through temperature regulation.
- Drip irrigation systems conserve water while maintaining plant health.
Getting Started with DIY Projects
To begin a DIY project, it’s essential to plan effectively.
Identify specific needs and available resources in your garden.
Consider the climate and local conditions that affect gardening.
Gather tools and materials necessary for the chosen project.
Transform Your Agribusiness
Unlock your farm's potential with expert advice tailored to your needs. Get actionable steps that drive real results.
Get StartedLastly, set a realistic timeline for project completion.
Selecting the Right Site for Your Garden Projects
Evaluating Sunlight Exposure
Assess the amount of sunlight your garden site receives daily.
Full sun areas get at least six hours of sunlight.
Partial shade areas receive three to six hours of sunlight.
Evaluate how sunlight changes throughout the year.
Understanding Soil Quality
Test the soil in your chosen garden location.
Good soil provides nutrients for your plants.
Look for a well-drained, loamy soil type.
Consider adding organic matter to improve soil quality.
Water Access and Drainage
Ensure your garden site has easy access to water.
Consider how rainwater drains from your site.
Avoid low-lying areas where water tends to pool.
Good drainage helps prevent root rot in plants.
Proximity to Your Home
Select a garden location close to your home.
This makes maintenance and harvesting easier.
It also encourages regular visits to your garden.
Considering Safety and Security
Evaluate the safety of your garden site.
Choose a location that is secure from pests and animals.
Fencing can protect your plants from hungry wildlife.
Consider visibility to deter theft or vandalism.
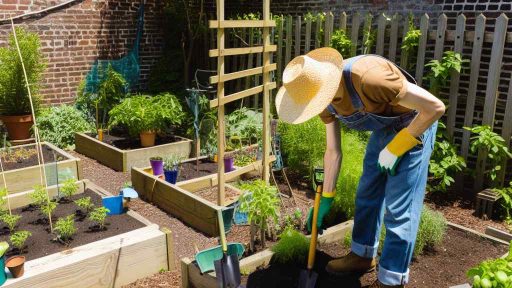
Essential Tools and Materials for DIY Garden Projects
Basic Gardening Tools
Every small-scale farmer needs reliable gardening tools.
Start with a sturdy spade for digging and turning soil.
A rake helps clear debris and level garden beds efficiently.
Pruning shears are vital for maintaining healthy plants.
Showcase Your Farming Business
Publish your professional farming services profile on our blog for a one-time fee of $200 and reach a dedicated audience of farmers and agribusiness owners.
Publish Your ProfileConsider adding a hoe for weeding and cultivating the soil.
Planting Materials
Use high-quality seeds suitable for your climate and soil type.
Seedlings can provide a head start for your garden.
Mulch is essential for retaining moisture in your garden.
Consider organic compost as a natural fertilizer.
Plant support materials, like stakes and trellises, promote plant growth.
Irrigation Systems
Efficient watering is crucial for a thriving garden.
Invest in a drip irrigation system for targeted watering.
Soaker hoses can also help distribute water evenly.
Rain barrels collect rainwater for sustainable irrigation.
Hand watering with a watering can allows for precise control.
Protective Gear
Safety is paramount when working in the garden.
Wear gloves to protect your hands from thorns and chemicals.
Use a sun hat to shield yourself from harmful UV rays.
Sturdy boots provide traction and protect your feet.
Lastly, an apron keeps your clothes clean and holds tools.
Discover More: Companion Planting for Pest Control in Organic Gardens
Vertical Gardening Techniques for Space Efficiency
Benefits of Vertical Gardening
Vertical gardening maximizes limited space efficiently.
This technique allows small-scale farmers to increase growing area.
Moreover, it enhances air circulation and sunlight exposure.
Additionally, vertical gardens can reduce pests and diseases.
Types of Vertical Gardening Systems
Several vertical gardening systems suit different needs.
- Wall planters are excellent for herbs and flowers.
- Pallet gardens offer a rustic, eco-friendly option.
- Trellises support climbing plants like beans and cucumbers.
- Hanging pots provide flexibility in plant placement.
Choosing the Right Plants
Selecting the right plants is crucial for success.
Opt for plants that thrive in vertical environments.
Consider growing varieties like strawberries or lettuce.
Furthermore, herbs such as basil and mint flourish in vertical spaces.
Creating a Vertical Garden
Starting a vertical garden involves a few simple steps.
Firstly, choose a suitable location with adequate sunlight.
Next, select your desired vertical gardening system.
Then, prepare the soil and arrange your plants thoughtfully.
Lastly, ensure proper watering and maintenance routines.
Maintenance and Care
Regular maintenance keeps your vertical garden thriving.
Water your plants consistently but avoid overwatering.
Check for pests or diseases frequently to catch issues early.
Additionally, fertilize your plants according to their specific needs.
Learn More: Legal Requirements for Beekeeping and Selling Honey in the USA
Building Raised Garden Beds: Step-by-Step Guide
Choosing the Right Location
Start by selecting a flat area for your raised garden beds.
Ensure the spot receives adequate sunlight for your plants.
Avoid areas with excessive shade or water pooling.
Gathering Materials
You will need untreated wood, like cedar or pine.
Showcase Your Farming Business
Publish your professional farming services profile on our blog for a one-time fee of $200 and reach a dedicated audience of farmers and agribusiness owners.
Publish Your ProfileOther essential materials include screws, a drill, and a saw.
Consider using landscape fabric to prevent weeds.
Constructing the Frame
Begin by cutting the wood to your desired dimensions.
For a simple rectangular bed, cut four pieces for the sides.
Next, assemble the frame using screws at each corner.
Ensure everything is square and aligned properly.
Securing the Bed
To prevent movement, dig shallow holes for the corners.
Place the frame in the holes and backfill with soil.
This creates stability for your raised bed.
Filling the Bed
Start by laying down landscape fabric inside the frame.
This helps to block weeds from coming through.
Next, fill the bed with a mix of soil and compost.
A good blend promotes healthy plant growth.
Planting and Maintenance
After filling the bed, it’s time to plant your seeds or seedlings.
Follow specific spacing requirements for each plant type.
Additionally, water regularly to keep the soil moist.
Consider adding mulch to retain moisture and reduce weeds.
Gain More Insights: Vertical Farming for Sustainable Agriculture in the USA
Creating a Compost System for Sustainable Gardening
Understanding Composting
Composting transforms organic waste into nutrient-rich soil amendments.
This process reduces landfill waste and enhances soil health.
Moreover, composting nurtures beneficial microorganisms in the soil.
Choosing a Compost Bin
Begin by selecting a compost bin that suits your space and needs.
Options range from simple piles to enclosed bins.
Consider factors like size, accessibility, and ventilation.
Gathering Compost Materials
Collect organic materials for your compost system.
Include kitchen scraps like fruit peels and vegetable waste.
Yard waste such as grass clippings and leaves also works well.
Avoid materials such as meat, dairy, and oily foods.
Balancing Green and Brown Materials
A successful compost pile needs both green and brown materials.
Green materials provide nitrogen and include fresh grass and coffee grounds.
Brown materials offer carbon and consist of dry leaves and cardboard.
Maintain a balance of roughly two parts brown to one part green.
Building the Compost Pile
Start building your compost pile in layers.
Begin with coarse brown materials at the bottom for airflow.
Add alternating layers of green and brown materials.
Ensure the pile is moist but not overly wet for optimal decomposition.
Maintaining the Compost System
Regularly turn your compost pile to aerate it and speed up breakdown.
Use a pitchfork or shovel for this task.
Monitor moisture levels; add water if the pile appears dry.
Additionally, check for odors, which may indicate problems.
Showcase Your Farming Business
Publish your professional farming services profile on our blog for a one-time fee of $200 and reach a dedicated audience of farmers and agribusiness owners.
Publish Your ProfileUsing Your Finished Compost
After a few months, your compost will be dark and crumbly.
This nutrient-rich compost can enhance garden soil and promote plant growth.
Use it in planting beds, potting mixes, or as a top dressing.
Furthermore, incorporating compost reduces the need for synthetic fertilizers.
Explore Further: Maximizing Neighborhood Engagement Through Inclusive Community Garden Events
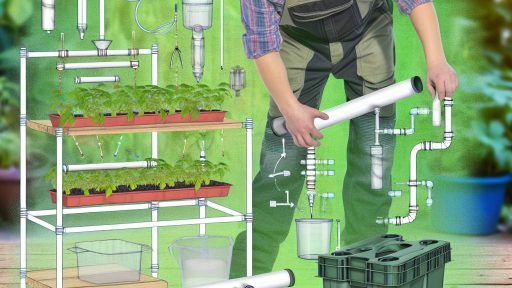
Water Conservation Methods: DIY Irrigation Solutions
Understanding Irrigation Systems
Irrigation systems play a crucial role in gardening.
They help ensure crops receive enough water.
Moreover, effective systems reduce water waste.
Drip Irrigation Basics
Drip irrigation delivers water directly to plant roots.
This method minimizes evaporation and runoff.
Create a drip system using simple materials.
- Use a garden hose with small holes.
- Connect a water source to the hose.
- Lay the hose along your plant rows.
Adjust the flow rate to suit different plants.
Rainwater Harvesting
Collecting rainwater is another great option.
This method conserves water and saves money.
Install a rain barrel beneath a downspout.
- Ensure the barrel has a mesh cover.
- Add a spigot for easy water access.
- Use stored rainwater for irrigation needs.
Furthermore, consider integrating multiple barrels for larger collections.
Soaker Hoses for Easy Watering
Soaker hoses provide an efficient way to water gardens.
These hoses soak the soil gradually and evenly.
Lay them out in your garden bed for best results.
- Connect the hose to a water source.
- Turn on the water and let it seep through the soil.
- Monitor the moisture level regularly.
This method helps maintain consistent soil moisture.
Smart Watering Techniques
Time your watering for optimal results.
Mornings and evenings are the best times to water.
Early hours prevent evaporation from the sun.
Additionally, consider using mulch around your plants.
- Mulch helps keep soil moist.
- It also suppresses weeds effectively.
- Organic options like straw or wood chips work well.
By implementing these techniques, you enhance water conservation in your garden.
Installing a Greenhouse on a Budget
Choosing the Right Location
Your greenhouse needs a suitable location to thrive.
Look for an area with ample sunlight exposure.
Avoid shaded spots from trees or buildings.
Consider wind protection to prevent damage.
Evaluate drainage to avoid flooding during rain.
Selecting Affordable Materials
Choosing cost-effective materials helps stay on budget.
Consider using PVC pipes for the frame.
Recycled windows can serve as excellent panels.
Polyethylene film provides good insulation without high costs.
Look for local supply stores for discounts and options.
Designing Your Greenhouse
Plan a simple but effective design to maximize space.
Low-cost designs can still efficiently utilize sunlight.
Consider a lean-to design against an existing structure.
A frame-and-cover style works well for small spaces.
Utilize vertical space for planting to enhance production.
Showcase Your Farming Business
Publish your professional farming services profile on our blog for a one-time fee of $200 and reach a dedicated audience of farmers and agribusiness owners.
Publish Your ProfileBuilding the Greenhouse
Follow safety precautions during construction.
Use proper tools for assembling the frame.
Ensure all connections are secure to provide stability.
Install the covering material carefully to avoid tears.
Add ventilation openings to promote air circulation.
Maintaining Your Greenhouse
Regular maintenance is key to a successful greenhouse.
Check for leaks in the covering material regularly.
Clean the interior to prevent pest infestations.
Adjust ventilation based on seasonal changes.
Monitor humidity levels to optimize plant growth.
Incorporating Pollinator Gardens to Enhance Biodiversity
Understanding Pollinator Gardens
Pollinator gardens play a crucial role in supporting diverse ecosystems.
They provide necessary habitat and food sources for various pollinators.
Common visitors include bees, butterflies, and hummingbirds.
These gardens help sustain the overall health of our environment.
Selecting the Right Plants
Choose native flowering plants that flourish in your region.
Native plants attract local pollinators effectively.
Include a variety of species to ensure continuous blooms throughout the seasons.
Consider plants like coneflowers, milkweeds, and bee balms.
Creating an Optimal Environment
Create sheltered spots within your garden using shrubs or trees.
Incorporate water sources, like shallow dishes, for thirsty pollinators.
Avoid using chemical pesticides to protect these valuable creatures.
Instead, opt for natural pest control methods.
Designing the Garden Layout
Plan your garden layout to maximize sunlight and accessibility.
Group plants in clusters to encourage pollinator visits.
Leave some areas a bit wild for natural habitat creation.
Consider adding features like pathways and seating for enjoyment.
Monitoring and Maintaining Your Garden
Regularly observe which plants attract the most pollinators.
Adjust your gardening practices based on their needs.
Consider rotating plants to maintain soil health and biodiversity.
Engage with fellow gardeners to share tips and experiences.
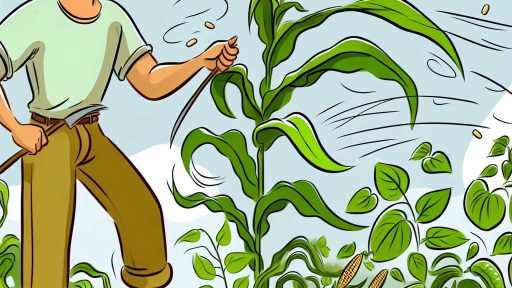
Seasonal Gardening Projects: Preparing for Each Season
Spring Preparation
Spring ushers in a flurry of gardening activities.
Start by cleaning up your garden beds from winter debris.
Next, test your soil to determine its nutrient needs.
Add organic matter to enrich the soil for healthy growth.
Plan your crop rotation to enhance soil health and yield.
Summer Maintenance
Summer requires diligent care for your plants.
Regularly check for pests and remove them promptly.
Water your plants consistently, especially during dry spells.
Prune excess foliage to promote airflow and reduce disease.
Consider mulching to retain moisture and suppress weeds.
Showcase Your Farming Business
Publish your professional farming services profile on our blog for a one-time fee of $200 and reach a dedicated audience of farmers and agribusiness owners.
Publish Your ProfileFall Harvesting
In the fall, focus on harvesting your crops.
Gather vegetables before the first frost to prevent damage.
Store your harvest properly to ensure longevity.
Begin cleaning up garden beds to prepare for winter.
Add cover crops to enhance soil structure during the off-season.
Winter Planning
Winter is ideal for planning the next year’s garden.
Review your successes and failures from the past season.
Order seeds early to ensure availability for spring planting.
Create a detailed planting schedule to maximize productivity.
Consider starting seedlings indoors for an early start.