Introduction to DIY Garden Projects for Backyard Farmers
Backyard farming is gaining popularity across the globe.
Many people are discovering the joys of growing their own food.
DIY garden projects can transform your backyard into a productive oasis.
These projects empower you to cultivate fresh produce at home.
Additionally, they promote creativity and self-sufficiency.
In this guide, we explore various DIY projects for every skill level.
Whether you are a beginner or an experienced gardener, there’s something here for you.
Let’s dive into some exciting and rewarding gardening ventures.
Benefits of DIY Garden Projects
Engaging in DIY garden projects brings numerous benefits.
First, you save money on grocery bills.
Growing your own food provides a sense of accomplishment.
Moreover, it encourages healthier eating habits.
Another advantage is reducing your carbon footprint.
Homegrown food is often fresher and tastier than store-bought options.
Additionally, these projects foster a deeper connection with nature.
Transform Your Agribusiness
Unlock your farm's potential with expert advice tailored to your needs. Get actionable steps that drive real results.
Get StartedTypes of DIY Garden Projects
A variety of DIY garden projects exist to suit different preferences.
Container gardening is ideal for limited spaces.
Vertical gardens also optimize space while adding aesthetic appeal.
Raised beds provide better soil drainage and easier access.
Companion planting enhances crop productivity and pest control.
Lastly, gardening tools and supplies are easily customizable.
Essential Tools and Materials for DIY Gardening
Basic Gardening Tools
Every backyard farmer needs essential tools to succeed in gardening.
A sturdy shovel aids in digging and turning soil effectively.
A reliable rake helps you level the soil and remove debris.
Moreover, a hand trowel is perfect for planting small plants.
Consider a pair of pruning shears to maintain plant health.
Additionally, a watering can facilitates easy watering of delicate plants.
Soil and Amendments
Quality soil is fundamental for a thriving garden.
Look for soil rich in organic matter for optimal growth.
Adding compost improves soil health and increases fertility.
Furthermore, mulch helps retain moisture and suppress weeds.
Seeds and Plants
Choosing the right seeds or plants is crucial for successful gardening.
Research which varieties thrive in your local climate.
Consider heirloom seeds for unique plant characteristics.
Starting with healthy seedlings can boost your garden’s success.
Protective Gear
Safety should always be a priority in gardening projects.
Wear gloves to protect your hands from dirt and injuries.
A wide-brimmed hat shields you from the sun’s rays.
Additionally, use knee pads for comfort while planting.
Showcase Your Farming Business
Publish your professional farming services profile on our blog for a one-time fee of $200 and reach a dedicated audience of farmers and agribusiness owners.
Publish Your ProfileMiscellaneous Supplies
Stock your gardening shed with a few additional supplies.
String or wire for supporting climbing plants can be helpful.
Labels can help you identify plants and track growth.
Consider a garden journal to record your gardening progress.
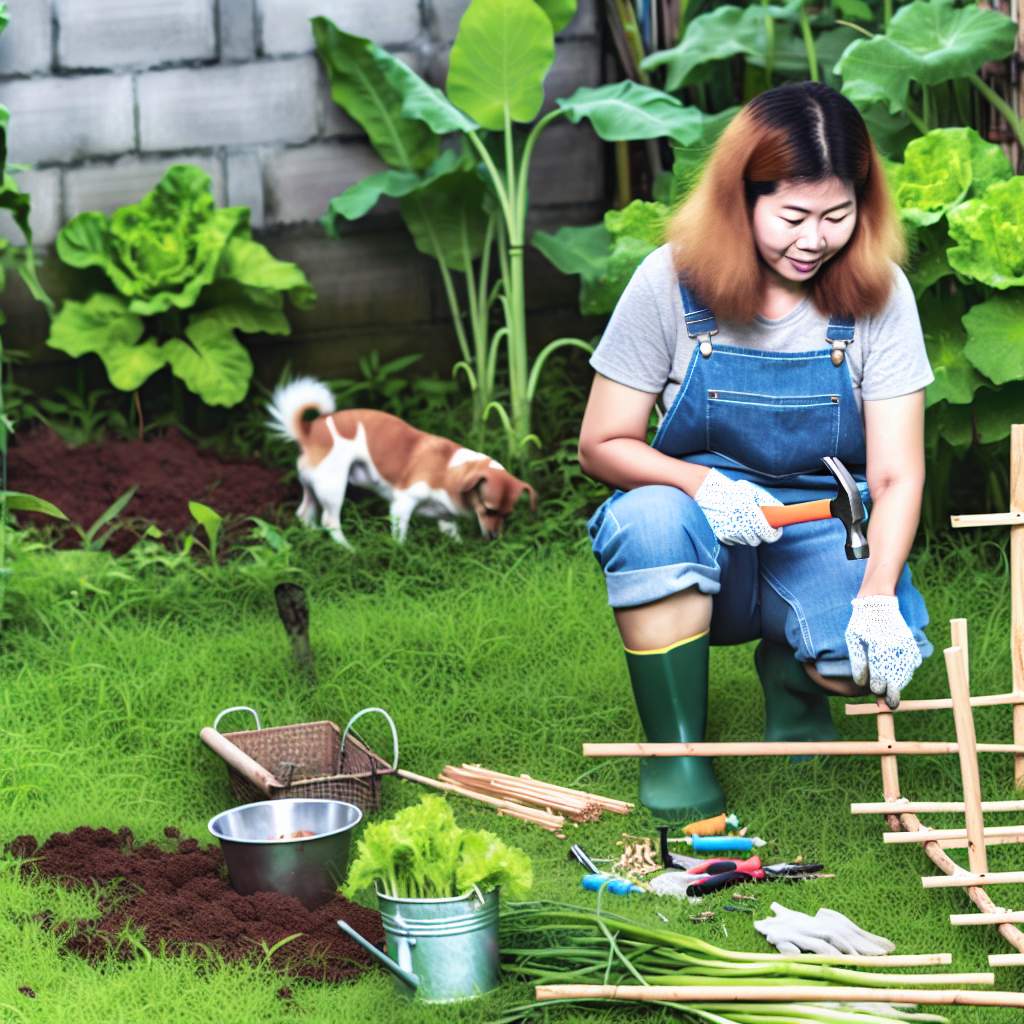
Creating Raised Garden Beds: Step-by-Step Guide
Gather Your Materials
Start by collecting your materials for the raised garden beds.
You will need untreated wood, screws, and a saw.
Additionally, gather soil and compost for filling your beds.
Consider using corner brackets for added stability.
Choose the Right Location
Select a spot in your yard that receives plenty of sunlight.
Avoid areas with overhanging tree branches.
Ensure good drainage by choosing a slightly elevated area.
Nearby water access will make maintenance easier.
Design Your Garden Bed
Decide on the dimensions of your raised bed.
Common dimensions are four feet wide and six to eight feet long.
Remember that beds should be no more than three feet wide for easy access.
Sketch your layout on paper for better visualization.
Build the Frame
Cut your wood to the desired lengths using a saw.
Assemble the pieces to form a rectangle or square.
Use screws or brackets to secure each corner tightly.
Double-check your board placement for a sturdy frame.
Prepare the Site
Clear the ground where your raised bed will sit.
Remove any grass, weeds, or debris from the area.
Level the ground to ensure your bed sits evenly.
Consider laying down cardboard or landscape fabric to prevent weeds.
Fill Your Raised Bed
Start by adding a layer of coarse materials at the bottom.
This can include large rocks or sticks for drainage.
Next, add a mixture of soil and compost for optimal growth.
Fill the bed to the top, but leave a few inches from the edge.
Plant and Maintain
Now it’s time to plant your seedlings or seeds in the soil.
Follow spacing guidelines based on the plants you choose.
Regularly check soil moisture and water as needed.
Additionally, monitor for pests and weeds throughout the growing season.
Enjoy Your Harvest
As plants grow, enjoy the sight of your thriving garden.
Harvest your crops when they reach maturity.
Finally, consider planting a new batch for continued growth.
Gain More Insights: Integrating Livestock Into Sustainable Crop Rotations On Small US Farms
Building a Compost Bin: Benefits and Instructions
Benefits of Composting
Composting reduces waste and diverts organic matter from landfills.
It enriches soil, improving its structure and fertility.
Moreover, composting creates beneficial microorganisms that aid plant growth.
Additionally, it helps in reducing greenhouse gas emissions.
Showcase Your Farming Business
Publish your professional farming services profile on our blog for a one-time fee of $200 and reach a dedicated audience of farmers and agribusiness owners.
Publish Your ProfileUltimately, composting supports sustainability in gardening practices.
Essential Materials
Select materials that decompose well and are easy to manage.
Use wooden pallets or wire mesh for the bin structure.
Gather brown materials like dry leaves, straw, and cardboard.
Also, collect green materials such as fruit scraps, grass clippings, and vegetable peels.
Do not forget to include water to maintain moisture in the compost.
Choosing a Location
Pick a spot that is conveniently accessible for regular use.
The location should have adequate sunlight and good drainage.
Avoid areas with excessive shade, as heat is essential for composting.
Furthermore, choose a site away from standing water to prevent flooding.
Lastly, ensure the spot is close to where you collect kitchen scraps.
Building the Compost Bin
Start by determining the size of your compost bin.
Next, assemble your chosen materials into a square or rectangle.
Secure the sides with nails or wire to ensure stability.
Leave enough space at the bottom for air circulation.
If using pallets, arrange them in a three-sided enclosure.
Adding Materials
Layer brown and green materials in the bin, alternating them.
This method ensures proper aeration and decomposition.
Maintain a balance of roughly three parts brown to one part green.
Periodically add water to keep the mixture moist but not soggy.
As the compost decomposes, mix the layers to promote even breakdown.
Maintaining the Compost Bin
Regularly turn the compost every few weeks for aeration.
This practice helps speed up the decomposition process significantly.
If the compost is too dry, sprinkle some water.
Conversely, if it’s too wet, add more brown materials to absorb moisture.
Check the temperature regularly to ensure it stays warm.
Using Finished Compost
Finished compost has a dark, crumbly texture and earthy smell.
Use it to enrich garden beds, potting soil, or as mulch.
Spread a layer of compost over your plants’ roots to nourish them.
Ultimately, using compost enhances soil fertility and boosts plant health.
Enjoy the benefits of your DIY composting efforts.
Find Out More: How to Improve Tomato Growth With Companion Planting
Installing a Drip Irrigation System: Tips and Tricks
Understanding Drip Irrigation
Drip irrigation delivers water directly to plant roots.
This method conserves water and promotes healthy growth.
Moreover, it reduces weed growth by targeting only desired plants.
Planning Your Drip Irrigation Layout
Start by assessing your garden’s layout and plant placement.
Identify areas that require more water and those that don’t.
Next, create a simple diagram to visualize your irrigation system.
Choosing the Right Materials
Invest in high-quality drip irrigation components for durability.
Common materials include hoses, emitters, connectors, and stakes.
Showcase Your Farming Business
Publish your professional farming services profile on our blog for a one-time fee of $200 and reach a dedicated audience of farmers and agribusiness owners.
Publish Your ProfileAdditionally, select a suitable water source for your system.
Installation Steps
Begin the installation by turning off your water supply.
Next, lay out the main hose along your designated paths.
Attach emitters at intervals based on plant watering needs.
Secure everything in place with stakes to prevent movement.
Lastly, connect the system to your water source and test it.
Maintenance Tips
Regularly check for clogs, leaks, or damaged parts.
Clean the emitters and filters to maintain optimal flow.
Adjust water pressure as needed to prevent overwatering.
Finally, winterize your system to prevent freezing-related damage.
Benefits of Drip Irrigation
This system maximizes water efficiency and reduces waste.
It also helps prevent soil erosion and nutrient runoff.
In addition, drip irrigation can lower your overall gardening costs.
See Related Content: Securing Grants And Resources For Expanding Community Garden Initiatives
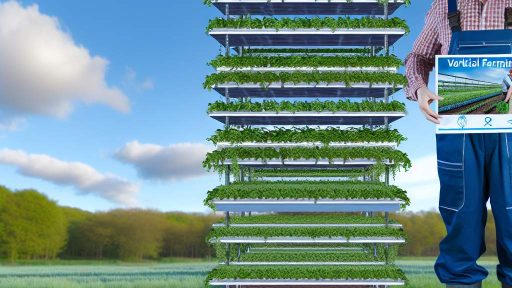
Designing and Constructing a Vertical Garden
Overview of Vertical Gardens
Vertical gardens utilize wall space to grow plants.
This method maximizes limited area efficiently.
Furthermore, it adds aesthetic value to your garden.
Benefits of Vertical Gardens
They save space by using vertical structures.
These gardens improve air quality around your home.
Moreover, they can reduce noise pollution effectively.
Choosing the Right Location
Select a spot that receives ample sunlight.
Avoid areas that experience excessive wind.
Consider accessibility for watering and maintenance.
Materials and Tools Needed
- Wood or metal for the frame
- Planting pockets or containers
- Soil and compost suitable for your plants
- Drill and screws for assembly
- Watering can or irrigation system
Building Your Vertical Garden
Begin by designing a layout that suits your space.
Construct the frame using sturdy materials.
Attach planting pockets securely to the frame.
Next, fill the pockets with soil and compost.
Finally, plant your chosen herbs or flowers.
Maintaining Your Vertical Garden
Regularly check for pests and diseases.
Water the plants as needed, keeping soil moist.
Additionally, prune as necessary to encourage growth.
Rotate plants seasonally to maximize yield.
Discover More: Seasonal Gardening for Year-Round Food Production
Creating a Pollinator Garden to Attract Beneficial Insects
Understanding the Importance of Pollinators
Pollinators play a vital role in our ecosystems.
They enhance biodiversity and contribute to food production.
Without them, many plants and crops would struggle to survive.
Choosing the Right Location
Select a sunny spot for your pollinator garden.
Most pollinators prefer areas with at least six hours of sunlight daily.
A space with minimal wind exposure is also beneficial.
Designing Your Garden Layout
Begin by deciding on the shapes and sizes of your garden beds.
Showcase Your Farming Business
Publish your professional farming services profile on our blog for a one-time fee of $200 and reach a dedicated audience of farmers and agribusiness owners.
Publish Your ProfileIncorporate various plants that bloom at different times.
This ensures a continuous food source for pollinators.
Selecting Flowering Plants
Choose native plants to attract local pollinators effectively.
Include flowers such as coneflowers and bee balm.
Consider adding herbs like lavender and mint for variety.
Creating Diverse Habitats
Provide a mix of flowers, shrubs, and trees in your garden.
Consider adding nesting sites, such as bee hotels.
Leave some areas of bare soil for ground-nesting bees.
Maintaining Your Pollinator Garden
Regularly weed and water your garden to promote healthy growth.
Avoid pesticides, as these can harm beneficial insects.
Instead, consider organic solutions to control pests.
Engaging Your Community
Invite neighbors to participate in your pollinator project.
Share tips and successes to inspire others.
Consider hosting workshops or garden tours to spread awareness.
DIY Garden Decor: Upcycling Ideas from Household Items
Upcycling Basics
Upcycling transforms old items into new treasures.
It reduces waste and is eco-friendly.
Moreover, it adds personal flair to your garden.
Potted Plants from Recycled Containers
Repurpose old cans as charming plant pots.
Simply clean them and add drainage holes.
Next, paint them for a vibrant garden look.
Also, consider using old teacups for herbs.
They create a whimsical touch in your space.
Garden Markers from Unwanted Items
Use popsicle sticks to label plants effectively.
Write plant names with a permanent marker.
Alternatively, old silverware can serve as chic markers.
Simply bend and shape them to your liking.
This adds elegance while recycling materials.
Furniture Revival in the Garden
Transform old wooden chairs into unique plant stands.
Sand them down and paint them to match your decor.
You can also use an old ladder to display pots.
Lean it against a wall for a vertical garden.
This creates a stunning visual effect.
Functional Decor with Glass Jars
Turn glass jars into beautiful lanterns for evenings.
Fill them with fairy lights or candles.
You can also use them for organizing garden tools.
Label each jar for easy identification.
This brings order and charm to your garden shed.
Creative Use of Pallets
Old pallets can be transformed into vertical gardens.
Attach landscape fabric and fill with soil.
Plant flowers or herbs for a stunning display.
Showcase Your Farming Business
Publish your professional farming services profile on our blog for a one-time fee of $200 and reach a dedicated audience of farmers and agribusiness owners.
Publish Your ProfileMoreover, pallets can serve as rustic garden benches.
Add cushions for comfort and style.
Get Started with Upcycling
Upcycling adds creativity to your garden decor.
It’s a fun way to express yourself.
Plus, it promotes sustainability without breaking the bank.
So gather your old items and start creating!
Additional Resources
Backyard Farming – Guide For Getting Started – Generation Acres Farm
Micro Farming: Growing Wheat in Your Backyard : 4 Steps (with …