Understanding Microgreens
Definition of Microgreens
Microgreens are young, edible plants harvested just after the first true leaves emerge.
They include various types of vegetables, herbs, and spices.
Common varieties include arugula, radish, and basil.
Microgreens are packed with flavor and nutrients.
Farmers and home gardeners often cultivate them in small spaces.
Benefits of Growing Microgreens
Growing microgreens offers numerous health benefits.
This type of produce is rich in vitamins, minerals, and antioxidants.
Several studies suggest they may contain higher nutrient levels than their mature counterparts.
Microgreens also provide an easy way to enhance dishes with vibrant colors and flavors.
They can be grown year-round, making them a versatile option for any kitchen.
Environmental Impact
Microgreens typically require less water and space than traditional crops.
Thus, they support sustainable farming practices.
Using indoor or vertical gardening methods further reduces environmental footprints.
By growing microgreens, gardeners can promote local food systems.
This contributes positively to community health and well-being.
Transform Your Agribusiness
Unlock your farm's potential with expert advice tailored to your needs. Get actionable steps that drive real results.
Get StartedCulinary Uses
Chefs and home cooks enjoy incorporating microgreens into various dishes.
They can elevate salads, sandwiches, and soups with unique flavors.
Microgreens also serve as decorative garnishes, enhancing presentation.
The variety of textures and tastes allows for creativity in culinary applications.
Exploring new combinations can lead to exciting culinary discoveries.
Not Choosing the Right Seeds
Importance of Seed Selection
Selecting the right seeds is crucial for successful microgreens cultivation.
The choice of seeds directly affects growth rates and flavor profiles.
Beginners often overlook this essential step, leading to disappointing results.
Moreover, not all seeds are suitable for microgreens production.
It’s essential to choose varieties known for their ease of growth.
Look for seeds specifically labeled for microgreens.
This label guarantees compatibility with the microgreen growing process.
Additionally, ensure the seeds are organic and non-GMO.
Organic seeds typically yield healthier plants and better flavors.
To avoid common pitfalls, do thorough research before purchasing seeds.
Online forums and gardening groups can offer valuable insights.
Furthermore, consider experimenting with a few different varieties.
This approach allows you to discover which ones thrive best in your environment.
Finally, check the germination rates of the seeds you plan to buy.
A high germination rate indicates a reliable seed source.
Insufficient Lighting
Understanding the Importance of Light
Light plays a vital role in growing healthy microgreens.
It affects germination, growth rate, and overall yield.
Without adequate lighting, plants may become weak and leggy.
Identifying Light Requirements
Each type of microgreen has unique light needs.
Showcase Your Farming Business
Publish your professional farming services profile on our blog for a one-time fee of $200 and reach a dedicated audience of farmers and agribusiness owners.
Publish Your ProfileFor example, sunflower microgreens thrive in bright light.
Conversely, some varieties prefer indirect light.
Research the specific needs of the microgreens you choose.
Optimal Light Conditions
Aim for at least 12 to 16 hours of light daily.
Use full-spectrum LED grow lights for best results.
These lights mimic natural sunlight effectively.
Position lights about 2 to 12 inches above the plants.
Monitoring Light Intensity
Regularly check how plants respond to the light.
Adjust the distance of the lights as needed.
Watch for signs of light stress, such as yellowing leaves.
Increase light intensity gradually to avoid shock.
Using Natural Light
Indoor growers can utilize natural light as an alternative.
Place trays near windows that receive ample sunlight.
Be aware of seasonal changes affecting light availability.
Supplement with artificial lights when necessary.
Timing and Duration
Establish a consistent daily light schedule.
Using timers can help automate this process.
This consistency promotes stable growth patterns.
Avoid prolonged darkness, which can hinder progress.
See Related Content: Permaculture Gardening Techniques for Small Farms
Balancing Moisture Levels
Understanding the Importance of Watering
Watering is crucial for growing microgreens successfully.
Both overwatering and underwatering can hinder growth.
Each microgreen type has specific moisture requirements.
Understanding these needs helps create the right environment.
Signs of Overwatering
Overwatering can lead to root rot and mold growth.
Look for yellowing leaves as a first sign of trouble.
Additionally, monitor for a foul smell from the soil.
Excess water can suffocate roots and promote disease.
Signs of Underwatering
Underwatering may cause wilting and stunted growth.
Leaves will curl and become crisp under dry conditions.
Plants may also show yellowing due to nutrient deficiencies.
Regular observation helps catch these issues early.
Establishing a Watering Routine
Create a consistent watering schedule for your microgreens.
Start by checking the soil moisture daily.
Use your finger to feel the soil two inches deep.
Adjust frequency based on environmental conditions.
Techniques for Proper Watering
Consider using a spray bottle for even dampening.
This method prevents over-saturation of any area.
Alternatively, use a gentle pour method with a watering can.
Ensure water reaches the root zone without flooding.
Showcase Your Farming Business
Publish your professional farming services profile on our blog for a one-time fee of $200 and reach a dedicated audience of farmers and agribusiness owners.
Publish Your ProfileUtilizing Moisture-Monitoring Tools
Invest in moisture meters for precise soil readings.
These tools help prevent guesswork in your watering routine.
Digital meters can provide real-time data on moisture levels.
Make adjustments to your routine based on readings.
Experimenting with Drainage
Ensure your growing trays have adequate drainage holes.
Good drainage prevents water accumulation and root issues.
Consider using porous materials to enhance airflow within soil.
Always encourage healthy root development through proper drainage.
Find Out More: How Companion Planting Supports Sustainable Agriculture
Poor Soil Quality – Choosing the Best Growing Medium
Importance of Quality Soil
Quality soil plays a vital role in successful microgreen cultivation.
It provides essential nutrients and supports healthy root growth.
Without the right medium, microgreens may struggle to thrive.
Characteristics of Ideal Growing Medium
An ideal growing medium retains moisture while preventing waterlogging.
It should allow air to circulate around the roots.
A blend of organic materials is often recommended.
Types of Growing Mediums
Consider using potting soil specifically formulated for microgreens.
Coconut coir is another excellent option due to its moisture-retaining capabilities.
In addition, soil-less mixes can offer great aeration and drainage.
Avoiding Common Pitfalls
Many beginners choose garden soil, which can carry pests or diseases.
Using compost alone may not provide enough structure for microgreens.
Similarly, overly dense mediums can hinder root development.
Testing Soil Quality
Before planting, check the pH level of your growing medium.
Microgreens prefer a slightly acidic to neutral pH, around 6.0 to 7.0.
You can use a simple pH test kit for this purpose.
Proper Maintenance of Growing Medium
Regularly check moisture levels to avoid over or under-watering.
Replace the growing medium if it becomes compacted over time.
Additionally, consider refreshing nutrients through organic fertilizers.
Learn More: Vertical Farming for Growing Fresh Produce Year-Round
Inadequate Air Circulation
Understanding the Importance of Ventilation
Proper air circulation is crucial in growing microgreens.
Plants require fresh air to thrive and grow efficiently.
Inadequate ventilation can lead to higher humidity levels.
Excess humidity may cause mold and disease in your crops.
Thus, ensuring good airflow helps promote healthy growth.
Signs of Poor Air Circulation
Certain symptoms can indicate inadequate air circulation.
Look out for yellowing leaves and stunted growth.
Mold on the soil surface is another red flag to consider.
Additionally, if you smell musty odors, it signals poor airflow.
Recognizing these signs early can prevent future issues.
How to Improve Airflow
You can implement several strategies to enhance air circulation.
Start by spacing out the trays correctly to allow airflow.
Showcase Your Farming Business
Publish your professional farming services profile on our blog for a one-time fee of $200 and reach a dedicated audience of farmers and agribusiness owners.
Publish Your ProfileUse fans to create a gentle breeze in your growing area.
Ensure that your growing environment is well-ventilated.
Regularly check for obstructions that may block airflow.
Best Practices for Ventilation
Following best practices can greatly improve air quality.
Position your microgreens away from walls and corners.
Consider using mesh covers instead of plastic domes.
Adjust the height of your light sources to enhance circulation.
Lastly, monitor humidity and temperature regularly.
Explore Further: Small Livestock Management for Diversified Income Streams on Farms

Ignoring Temperature and Humidity
Creating the Ideal Environment
One common mistake in growing microgreens is neglecting temperature and humidity levels.
Both factors significantly influence the growth and health of your microgreens.
First, maintain a consistent temperature of 70-75°F for optimal growth.
If temperatures fall below or exceed this range, growth may slow or stop.
Additionally, ensure proper humidity levels between 40-70% to promote healthy sprouting.
Monitoring Environmental Conditions
Regularly check the temperature and humidity in your growing area.
Use digital thermometers and hygrometers for accuracy.
Moreover, adjust ventilation if humidity levels are too high.
This adjustment prevents mold and rot from affecting your crops.
Providing Adequate Light
Light requirements often change with environmental conditions.
In cooler temperatures, consider using grow lights to supplement natural sunlight.
Ensure your microgreens receive at least 12-16 hours of light daily.
Proper lighting supports faster growth and vibrant leaves.
Using Proper Containers
Container choice can also affect temperature and humidity management.
Opt for shallow trays to allow air circulation around microgreens.
Poor air circulation can lead to undesirable temperature spikes.
Additionally, consider using biodegradable containers for better moisture retention.
Adjusting Watering Techniques
Finally, adjust your watering based on temperature and humidity levels.
In drier conditions, you may need to water more frequently.
However, ensure the soil remains moist but not soggy.
This balance helps promote strong root systems and healthy growth.
Delaying Harvest – Knowing When to Harvest for Peak Flavor
Importance of Timing
Timing is essential in growing microgreens.
Harvesting too late can lead to bitter flavors.
Microgreens develop their best taste when picked at the right moment.
Identifying the Right Time to Harvest
Observers need to watch the growth closely.
Most microgreens reach maturity in 7 to 21 days.
Identify the first true leaves, known as cotyledons.
These leaves indicate readiness for harvest.
Signs of Peak Flavor
Look for vibrant color and firm leaves.
Additionally, check for a crisp texture.
Smell can also indicate ripeness; fresh aromas suggest readiness.
Showcase Your Farming Business
Publish your professional farming services profile on our blog for a one-time fee of $200 and reach a dedicated audience of farmers and agribusiness owners.
Publish Your ProfileAvoiding Delays
Regular monitoring helps avoid late harvesting.
Set reminders based on the specific microgreen variety.
Use a journal to track growth stages effectively.
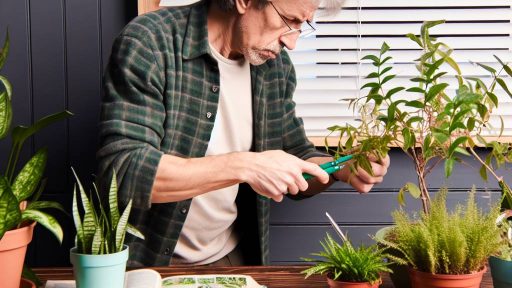
Best Practices for Harvesting
Use clean, sharp scissors for a tidy cut.
Harvest in the morning for maximum flavor retention.
Handle the microgreens gently to avoid crushing.
Consider storing harvested microgreens in a cool, dark place.
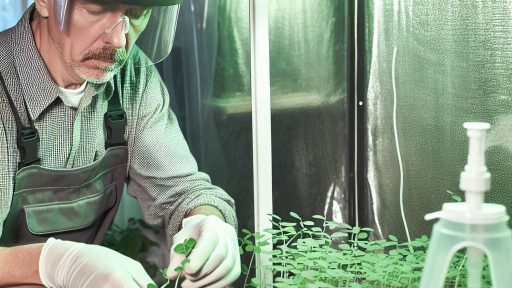
Lack of Sanitization – Preventing Mold and Disease in Microgreens
Understanding the Importance of Sanitization
Sanitization is crucial for healthy microgreens.
It reduces risks of mold and disease that can affect your crops.
Additionally, sanitation promotes a clean growing environment.
Common Sources of Contamination
Microgreens can get contaminated from various sources.
Contaminated seeds can introduce pathogens into your setup.
Also, dirty tools and equipment can spread harmful bacteria.
Lastly, unclean growing trays may harbor mold spores.
Effective Sanitization Practices
Start by using sanitized seeds to minimize risks.
Soak seeds in a sanitizing solution before planting.
Make sure to clean all tools and equipment regularly.
- Use hot soapy water or a bleach solution for cleaning.
- Rinse thoroughly after sanitizing to remove any residue.
Consider using sterile growing trays to further reduce contamination.
Monitoring and Maintaining a Clean Environment
Keep a close eye on your growing area.
Regularly inspect for signs of mold or disease.
If you notice any, take immediate action to address the issue.
- Remove affected microgreens promptly.
- Improve air circulation to help prevent mold growth.
Implementing preventive measures ensures healthier crops over time.
Utilizing Proper Storage Techniques
Store your microgreens in clean, sanitized containers.
Ensure these containers are dry to prevent mold growth.
Avoid overcrowding in storage to maintain airflow.
In addition, refrigerate microgreens to extend their freshness.
Additional Resources
Farm Small Farm Smart: Vegetable Farming Podcast ft. Shawn Kuhn