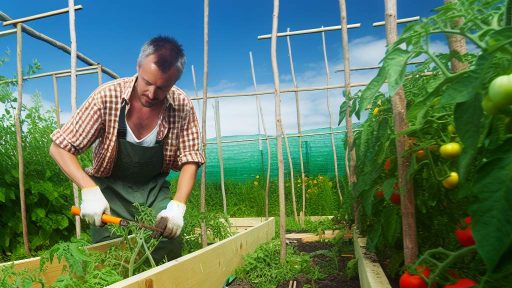
Introduction to Microgreens
Definition of Microgreens
Microgreens are young plants harvested just after the first true leaves develop.
They include a variety of vegetables, herbs, and edible flowers.
Typically, microgreens are between one to three inches tall.
Many growers use them for their vibrant colors and intense flavors.
Benefits of Microgreens
Growing microgreens offers several nutritional benefits.
They contain higher concentrations of vitamins compared to mature plants.
For example, microgreens can have up to 40 times more nutrients.
These nutrients include vitamins C, E, and K, as well as beta-carotene.
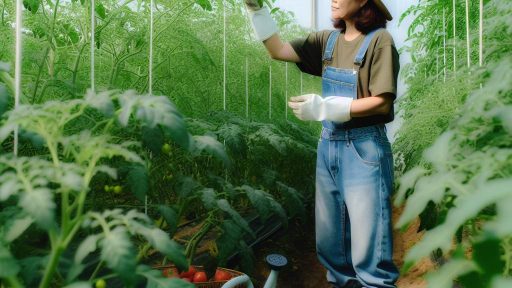
Additionally, microgreens are easy to grow indoors.
They require minimal space and can thrive in various conditions.
Indoor gardening allows for a continuous harvest regardless of the season.
Furthermore, microgreens add flavor and color to dishes.
They enhance salads, sandwiches, and various culinary creations.
Overall, microgreens are a versatile and healthful addition to any diet.
Choosing the Right Microgreens
Popular Varieties for Indoor Growth
Selecting the right microgreens is essential for successful indoor gardening.
Transform Your Agribusiness
Unlock your farm's potential with expert advice tailored to your needs. Get actionable steps that drive real results.
Get StartedSome varieties thrive better in indoor conditions than others.
Popular choices include broccoli, radish, and pea shoots.
These microgreens are nutrient-rich and easy to grow indoors.
Broccoli Microgreens
Broccoli microgreens offer a mild, slightly peppery flavor.
They are packed with vitamins A, C, and K.
This variety germinates quickly, typically within five to seven days.
Broccoli microgreens are versatile and can enhance many dishes.
Radish Microgreens
Radish microgreens are known for their spicy kick.
They contain high levels of antioxidants and vitamins.
These seeds germinate rapidly, usually within four to six days.
They add color and zest to salads and sandwiches.
Pea Shoots
Pea shoots have a sweet, fresh flavor that many enjoy.
These greens are a good source of protein, vitamins, and fiber.
They grow quickly, typically sprouting within six to eight days.
Pea shoots are perfect for stir-fries and garnishing dishes.
Other Notable Varieties
Other excellent microgreen options include sunflower and beet greens.
Sunflower microgreens have a nutty flavor and are rich in healthy fats.
Beet microgreens are vibrant and contain powerful antioxidants.
Each variety offers unique flavors and health benefits.
Essential Supplies for Growing Microgreens Indoors
Growing Containers
Choose shallow trays for growing microgreens effectively.
Look for containers with drainage holes.
Consider using seedling flats or recycled food containers.
Growing Medium
Select a quality potting soil or growing mix for microgreens.
A lightweight mix helps with drainage and aeration.
Showcase Your Farming Business
Publish your professional farming services profile on our blog for a one-time fee of $200 and reach a dedicated audience of farmers and agribusiness owners.
Publish Your ProfileSome growers prefer coconut coir or peat-based mixes.
Seeds
Invest in high-quality seeds specifically for microgreens.
Popular options include radish, pea, and basil seeds.
Check the germination rates before purchasing.
Lighting
Provide adequate light for optimal growth.
LED grow lights work well for indoor conditions.
Position lights about 6 to 12 inches above the plants.
Watering Tools
Use a spray bottle or watering can with a fine spout.
Proper watering prevents over or under-watering.
Ensure that the soil remains moist but not soggy.
Temperature and Humidity Control
Maintain a temperature between 60°F and 75°F.
Monitor humidity levels to avoid damping off disease.
Consider using a small fan for air circulation.
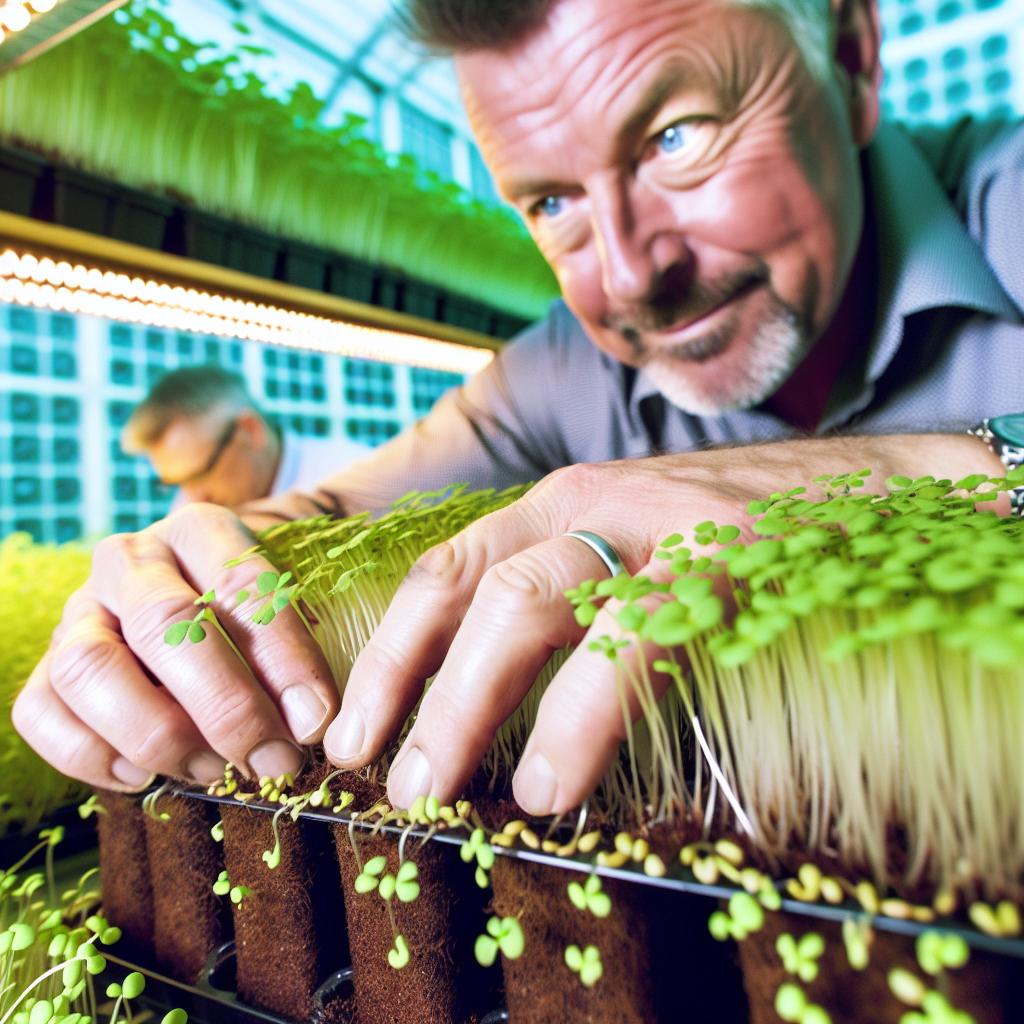
Harvesting Tools
Keep scissors or shears handy for easy harvesting.
Harvest your microgreens when they are about 2-3 inches tall.
Always use clean tools to maintain hygiene.
Delve into the Subject: DIY Garden Projects for Vegetable Farming
Soil vs. Hydroponic Systems: Which is Best for Indoor Microgreens?
Understanding Soil-Based Systems
Soil-based systems offer a natural growing environment for microgreens.
The soil supplies essential nutrients to the plants.
This method retains moisture effectively, promoting seed germination.
Also, it encourages beneficial microbial activity.
However, soil can introduce pests and diseases.
Maintaining soil health requires regular monitoring.
Exploring Hydroponic Systems
Hydroponic systems use nutrient-rich water instead of soil.
Plants receive nutrients directly through their roots.
This method accelerates growth and increases yield.
Hydroponics minimizes the risk of soil-borne pests.
It creates a cleaner and more controlled environment.
However, initial setup costs can be higher.
Comparing Growth Rates
Microgreens grown in hydroponic systems often grow faster.
They typically reach harvest size within seven to fourteen days.
Soyl-grown microgreens may take longer to mature.
This is due to the time needed for soil amendments.
In terms of yield, hydroponics often produces greater quantities.
Assessing Nutrient Availability
Soil provides a diverse range of nutrients to microgreens.
This diversity supports robust flavor profiles.
Hydroponic systems require careful nutrient management.
Growers must regularly monitor and adjust the nutrient solution.
Therefore, a well-maintained hydroponic system can deliver excellent yields.
Environmental Considerations
Soil systems are often more eco-friendly.
Showcase Your Farming Business
Publish your professional farming services profile on our blog for a one-time fee of $200 and reach a dedicated audience of farmers and agribusiness owners.
Publish Your ProfileThey utilize natural resources and support biodiversity.
Hydroponics can be very sustainable with efficient water use.
However, it relies heavily on electricity for pumps and lights.
Choosing between these systems depends on individual preferences.
Learn More: Implementing Biosecurity Measures To Safeguard Small Farm Livestock Health
Light Requirements
Understanding Indoor Lighting Options
Lighting plays a crucial role in growing microgreens indoors.
Balance the intensity and duration of light exposure for optimal growth.
Microgreens thrive under specific light conditions.
Choose between natural and artificial light sources.
Natural Light Sources
Sunlight is an excellent option for growing microgreens.
Place your microgreens near a south-facing window for maximum exposure.
However, seasons can affect sunlight availability.
Use sheer curtains to diffuse harsh sunlight if necessary.
Artificial Light Sources
Use artificial lights to supplement natural sunlight.
LED grow lights are popular due to their efficiency.
Fluorescent lights are also suitable for indoor gardening.
Keep lights 2-4 inches above your microgreens for best results.
Light Duration
Microgreens typically need 12-16 hours of light daily.
Use a timer to regulate light exposure consistently.
Adjust light duration according to plant growth stages.
Enhancing Microgreen Growth Through Light Management
Carefully selecting and managing light sources will enhance microgreen growth.
Experiment with different setups for the best results.
Delve into the Subject: Exploring Sustainable Practices For Greenhouse Farming In Rural Usa Regions
Watering Techniques: How to Properly Hydrate Microgreens
Understanding Microgreen Needs
Microgreens require consistent moisture for optimal growth.
Too much water can lead to mold and root rot.
On the other hand, under-watering results in stunted growth.
Thus, finding the right balance is crucial.
Watering Frequency and Timing
Check the moisture level daily to ensure proper hydration.
The best time to water is in the morning.
Watering early allows excess moisture to evaporate during the day.
Additionally, avoid watering during the hottest part of the day.
Techniques for Effective Watering
There are several effective watering techniques to consider.
- Use a spray bottle for light misting.
- Employ a watering can for more direct watering.
- Consider bottom watering for consistent hydration.
Choosing the Right Watering Method
Spray bottles work well for delicate seedlings.
This method helps avoid displacing seeds.
Watering cans are ideal for more mature microgreens.
Finally, bottom watering allows roots to absorb moisture gradually.
Monitoring Soil Moisture
Use your finger to check the soil moisture level.
If the top inch feels dry, it’s time to water.
A moisture meter can provide more precise readings.
Adjust your watering schedule based on environmental factors.
Showcase Your Farming Business
Publish your professional farming services profile on our blog for a one-time fee of $200 and reach a dedicated audience of farmers and agribusiness owners.
Publish Your ProfilePreventing Common Watering Issues
Overwatering can cause serious health issues for microgreens.
Look for yellowing leaves as a warning sign.
If you notice this, reduce watering frequency.
Under-watering will also show signs, such as wilting.
Adjusting for Seasonal Changes
Indoor climate may vary with the seasons.
In winter, heaters can dry out the air quickly.
In contrast, summer humidity can keep the soil moist longer.
Adjust your watering method according to seasonal changes.
Find Out More: Sustainable Composting Techniques for Small-Scale Farmers
Harvesting Techniques for Maximizing Yield and Freshness
Understanding the Importance of Timing
Timing plays a crucial role in harvesting microgreens.
Harvest them at their peak for optimal flavor and nutrition.
Most microgreens are ready between 7 to 21 days after sowing.
The exact timing depends on the variety and growing conditions.
Check the leaves for size and color to ensure readiness.
Using Proper Tools
Equip yourself with appropriate tools for harvesting.
A sharp pair of scissors or garden shears works best.
Clean tools reduce the risk of introducing pathogens.
Ensure your scissors are sterile before each use.
Cutting Techniques for Best Results
Cut microgreens just above the soil line during harvesting.
This technique minimizes damage to the plant roots.
Hold the microgreens gently but firmly to avoid shredding.
Consider using a ruler to ensure uniform cuts.
Handling and Storing Microgreens
Handle harvested microgreens with care to maintain freshness.
Use a soft container to avoid bruising the greens.
Store them in a cool, dark place to extend shelf life.
For longer storage, consider using airtight containers.
Watering After Harvesting
Water the remaining microgreens after harvesting.
This helps promote further growth for continuous harvesting.
Use a gentle misting to avoid over-saturating the soil.
Utilizing Light for Regrowth
Provide adequate light for any remaining greens to regrow.
Strong light encourages quick regeneration of new shoots.
Using a grow light can enhance growth if natural light is insufficient.
Planning for a Continuous Harvest
Stagger your planting schedule for continuous harvests.
Plant new trays every week or two for uninterrupted supply.
This method ensures you always have fresh microgreens on hand.
Track your planting and harvesting dates for best results.
Pest Management: Common Indoor Pests and Sustainable Solutions
Identifying Common Indoor Pests
Indoor gardening enthusiasts often encounter pests.
Common pests include aphids, spider mites, and fungus gnats.
Aphids suck sap from plants and can cause yellowing leaves.
Spider mites thrive in dry conditions and produce fine webs.
Showcase Your Farming Business
Publish your professional farming services profile on our blog for a one-time fee of $200 and reach a dedicated audience of farmers and agribusiness owners.
Publish Your ProfileFungus gnats lay eggs in damp soil, damaging young roots.
Identifying these pests early is crucial for effective management.
Sustainable Pest Management Strategies
Sustainable pest management focuses on eco-friendly solutions.
First, introduce beneficial insects like ladybugs and predatory mites.
These insects naturally control pest populations without chemicals.
Next, use insecticidal soap or neem oil to combat infestations.
Both products are derived from natural sources and safe for plants.
Regularly inspect plants and remove any visible pests manually.
Preventative Measures for Indoor Gardens
Preventing pests is often easier than dealing with infestations.
Start by maintaining good air circulation around your plants.
Proper ventilation reduces humidity, making environments less hospitable for pests.
Additionally, practice crop rotation to disrupt pest life cycles.
Cleanliness is vital; remove dead leaves and debris promptly.
Lastly, ensure you source seeds and plants from reputable suppliers.
Monitoring and Adjusting Conditions
Keep a close eye on your indoor garden’s environment.
Adjust humidity and temperature to suit your specific microgreens.
Regularly check for signs of pest activity or plant stress.
By staying observant, you can take action before pests become a problem.
Track the effectiveness of your pest management strategies regularly.
This approach helps you improve your methods over time.
Seasonal Considerations
Understanding Indoor Growth Conditions
Indoor growing presents unique challenges throughout the year.
Temperature and humidity levels fluctuate with the seasons.
Adjusting these conditions is crucial for healthy microgreens.
Consider using a small heater or humidifier as needed.
Adapting Light Sources
Light is vital for the growth of microgreens.
In winter, natural light diminishes significantly.
Supplement with grow lights to ensure proper growth.
LEDs offer a spectrum ideal for microgreen development.
Watering and Nutrition Adjustments
The watering frequency may shift with seasonal temperature.
In warmer months, microgreens may require more water.
Conversely, reduce watering during colder periods.
Monitor the soil moisture consistently for best results.
Utilize organic fertilizers to boost nutrient availability.
Pest Management Strategies
Pest control varies with seasons and indoor conditions.
Spring and summer often see increased pest activity.
Implement preventive measures such as neem oil sprays.
Regularly inspect plants for signs of pests or disease.
Choosing the Right Microgreens for Each Season
Selecting appropriate microgreen types can enhance success.
Some varieties thrive better in cooler or warmer temperatures.
Consider growing kale and arugula in cooler months.
Showcase Your Farming Business
Publish your professional farming services profile on our blog for a one-time fee of $200 and reach a dedicated audience of farmers and agribusiness owners.
Publish Your ProfileIn contrast, basil and radish can flourish during warmer seasons.
Creating an Optimal Indoor Environment
Maintain a consistent temperature around 60-75°F.
Humidifiers help maintain sufficient moisture in the air.
Also, use fans to foster air circulation and prevent mold.
Establishing a routine checkup will ensure a healthy setup.
Creative Ways to Incorporate Microgreens into Daily Meals
Adding Microgreens to Breakfast
Start your day with a nutritious smoothie boosted by microgreens.
Combine spinach microgreens with banana and yogurt for extra flavor.
Top your avocado toast with radish microgreens for a peppery kick.
Consider adding microgreens to scrambled eggs for visual appeal and nutrition.
Microgreens in Lunch Dishes
Sprinkle microgreens on salads to enhance color and taste.
Use basil microgreens in pasta dishes for an herby touch.
Add sunflower microgreens to sandwiches for a crunchy texture.
Try using microgreens as a garnish for soups or broths.
Using Microgreens with Dinner
Incorporate microgreens into stir-fries for added nutrients.
Mix pea shoots into your favorite grain bowls for freshness.
Top grilled fish or chicken with a handful of arugula microgreens.
Consider microgreens as a finishing touch on pizzas for extra flavor.
Microgreens in Snacks and Appetizers
Add microgreens to hummus for an unexpected twist.
Use them as a crunchy topping on your favorite dip.
Incorporate microgreens into wraps for an easy snack option.
Try pairing microgreens with cheese on a charcuterie board.
Experiment with Unique Combinations
Combine different microgreens to discover new flavors.
Mix spicy and sweet microgreens to create exciting salads.
Consider pairing microgreens with fruit in desserts for a surprise element.
Get creative and add microgreens wherever you can!
Additional Resources
Farm Small Farm Smart: Vegetable Farming Podcast ft. Shawn Kuhn